
Ns3 Installation in Windows 10
In general, a researcher is supposed to know all the technical tactics and techniques. Alright! Let’s we have a glance at every portions of this article to know the gripping details about the ns3 installation.
Install Ubuntu
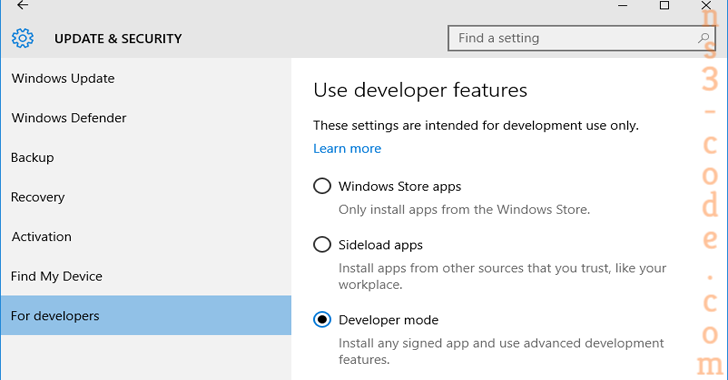
We have to implement the following steps in windows 10 (64 bit). First, the developer mode has to be turned on through settings → update & security → for developers, this new feature is particularly meant for developers.
Then, we have to turn on the new windows feature, windows subsystem for linux (Beta).
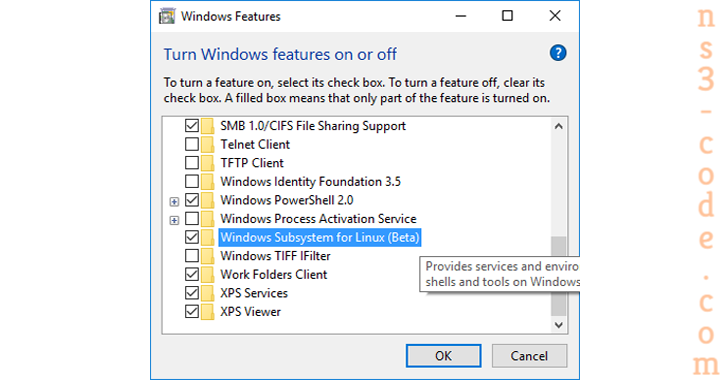
Following that, the system has to be rebooted and then we have to press the start button and type “bash” or else we can open the command prompt to launch the window for Ubuntu.
Download Ns-3.26
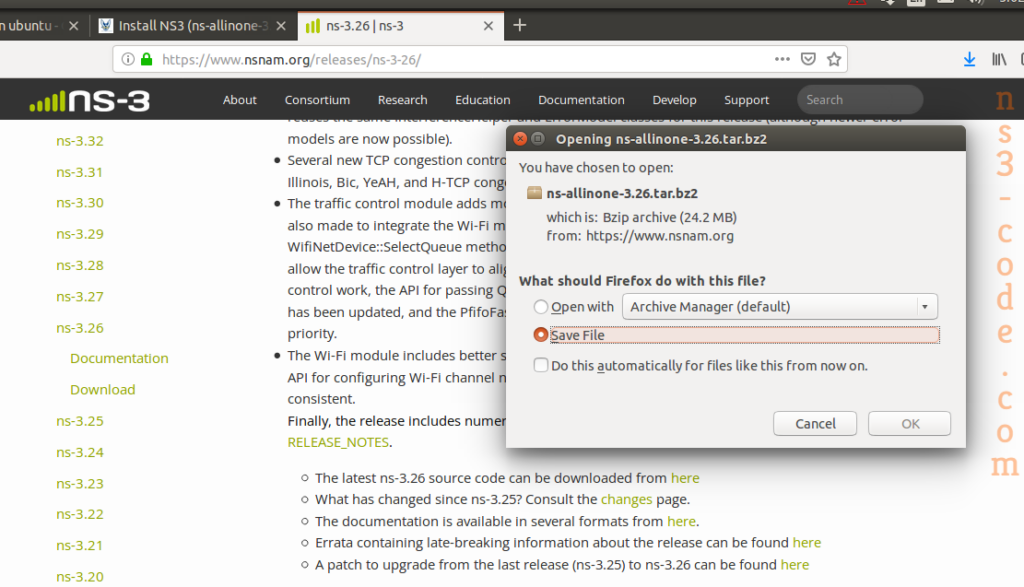
Next, the ns-3.26 packages are downloaded through the below mentioned URL.
Ns-3.26 Installation
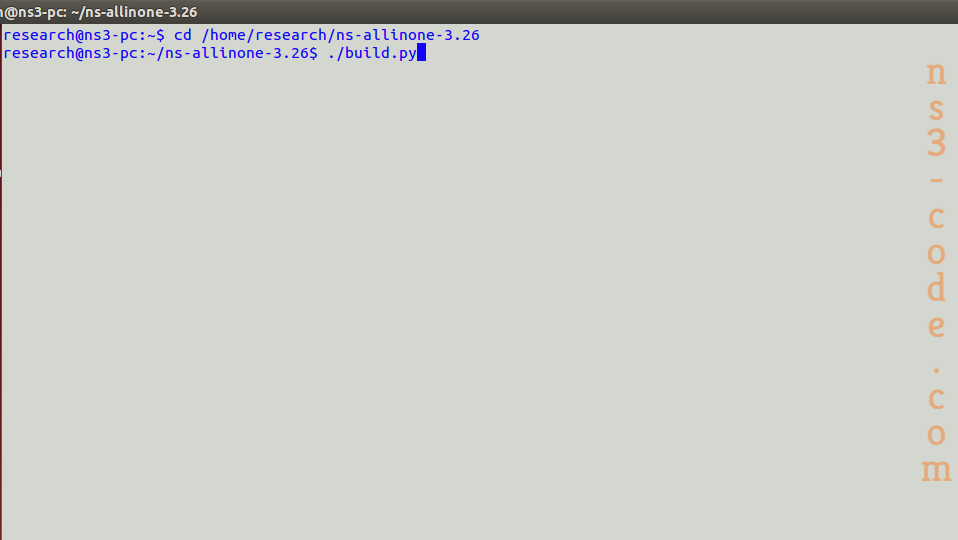
The below mentioned commands are implemented to install the ns-3.26 in the terminal window.
cd /home/ hostname /ns-allinone-3.26
./build.py
Verify Ns-3.26 Installation
Finally, we have to verify the ns-3.26 packages that are installed through the implementation of the following commands.
cd /home/hostname/ns-allinone-3.26/ns-3.26
./test.py

As far as, we learned the process of installing Ns3 in windows 10 and we have confidence on our explanations as well as believing that you are capable to install it by your own and you can make call to us to clarify your doubts.
 Click Here to watch our latest output video using NS3 simulator
  Click Here to watch our latest projects screenshots using NS3 simulator